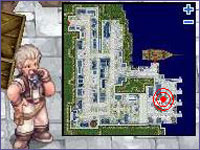
Diferencia entre revisiones de «Constellation Tower/en»
(Página creada con «{| class="wikitable unsortable" ! Stat !! Sealed !! ☆ !! ☆☆ !! ☆☆☆ |- ! Health | rowspan=5 align=center|0% | align=center|15% | align=center|30% | align=center|45% |- ! Attack | align=center|20% | align=center|40% | align=center|60% |- ! Recovery | align=center|30% | align=center|60% | align=center|90% |- ! Defense | align=center|50% | align=center|100% | align=center|150% |- ! Traps | align=center|85% | align=center|170% | align=center|255% |} {{clear}}…») |
(Actualizando para coincidir con nueva versión de la página fuente) Etiqueta: Revertido |
||
| Línea 1: | Línea 1: | ||
<languages/>__TOC__ | <languages/><div class="mw-translate-fuzzy"> | ||
__TOC__ | |||
== Overview == | == Overview == | ||
Constellation Tower is the major overhaul of Endless Tower. Guided by Oscar once again, Constellation Tower reaches for the stars in terms of difficulty with its unique random difficulty system and time restriction. | Constellation Tower is the major overhaul of Endless Tower. Guided by Oscar once again, Constellation Tower reaches for the stars in terms of difficulty with its unique random difficulty system and time restriction. | ||
</div> | |||
<div class="mw-translate-fuzzy"> | |||
Unlike Endless Tower which had specific monsters and MVPs on designated floors, Constellation Tower's floors have all randomized monsters per floor. | Unlike Endless Tower which had specific monsters and MVPs on designated floors, Constellation Tower's floors have all randomized monsters per floor. | ||
</div> | |||
[[File:X1Khyus.jpg|center|alt=Constellation Tower Released]] | [[File:X1Khyus.jpg|center|alt=Constellation Tower Released]] | ||
<div class="mw-translate-fuzzy"> | |||
== Quest == | == Quest == | ||
{{Repeatable|cooldown=1 day|verb=This instance can be repeated.|verb2=This instance has a cooldown of}} | {{Repeatable|cooldown=1 day|verb=This instance can be repeated.|verb2=This instance has a cooldown of}} | ||
</div> | |||
<br/> <br/> | <br/> <br/> | ||
| Línea 15: | Línea 21: | ||
{{clear}} | {{clear}} | ||
<div class="mw-translate-fuzzy"> | |||
# In Alberta, talk to Captain Janssen {{Navi|alberta|214|77}} and donate 10,000 Zeny. | # In Alberta, talk to Captain Janssen {{Navi|alberta|214|77}} and donate 10,000 Zeny. | ||
# Listen to him and agree to be his first mate so he will bring you to the ''Misty Island''. | # Listen to him and agree to be his first mate so he will bring you to the ''Misty Island''. | ||
| Línea 21: | Línea 28: | ||
#* If in 60 minutes they do not finish, all players in the dungeon will be warped out and sent back to their save points. | #* If in 60 minutes they do not finish, all players in the dungeon will be warped out and sent back to their save points. | ||
#* Instance Cooldown starts individually for each party member that enters. | #* Instance Cooldown starts individually for each party member that enters. | ||
</div> | |||
<div class="mw-translate-fuzzy"> | |||
== Skips == | == Skips == | ||
On every 5th floor you can choose to skip 4 floors by interacting with the top blue brazier at the start of the current floor. | On every 5th floor you can choose to skip 4 floors by interacting with the top blue brazier at the start of the current floor. | ||
</div> | |||
<div class="mw-translate-fuzzy"> | |||
Using a skip costs 50 {{Item List 2|id=1000372|item=Meteorite Dust|simple=yes}}, increasing by 25 for each skip. | Using a skip costs 50 {{Item List 2|id=1000372|item=Meteorite Dust|simple=yes}}, increasing by 25 for each skip. | ||
</div> | |||
<div class="mw-translate-fuzzy"> | |||
== Monsters == | == Monsters == | ||
* Monsters are different from their original Endless Tower or field version and don't have their original loot table. | * Monsters are different from their original Endless Tower or field version and don't have their original loot table. | ||
| Línea 32: | Línea 45: | ||
* Every 5th floor additionally has a random boss monster. | * Every 5th floor additionally has a random boss monster. | ||
* Boss monsters are not affected by the floor progression difficulty modifier and don't need to be defeated to advance to the next floor. | * Boss monsters are not affected by the floor progression difficulty modifier and don't need to be defeated to advance to the next floor. | ||
</div> | |||
<div class="mw-translate-fuzzy"> | |||
=== Normal Monsters === | === Normal Monsters === | ||
{{Monster_Table|collapsible=yes|data= | {{Monster_Table|collapsible=yes|data= | ||
| Línea 86: | Línea 101: | ||
{{Monster_Row|id=21047|name=Banshee|hp=40,000,000|level=245|def=??|mdef=??|size=??|element=??|race=??|map=1@ch_t}} | {{Monster_Row|id=21047|name=Banshee|hp=40,000,000|level=245|def=??|mdef=??|size=??|element=??|race=??|map=1@ch_t}} | ||
}} | }} | ||
</div> | |||
<div class="mw-translate-fuzzy"> | |||
=== 5th Floor Bosses === | === 5th Floor Bosses === | ||
{{Monster_Table|collapsible=yes|data= | {{Monster_Table|collapsible=yes|data= | ||
| Línea 125: | Línea 142: | ||
{{Monster_Row|id=21359|name=Beelzebub|mvp=yes|hp=??|level=250|def=??|mdef=??|size=??|element=??|race=??|map=1@ch_t}} | {{Monster_Row|id=21359|name=Beelzebub|mvp=yes|hp=??|level=250|def=??|mdef=??|size=??|element=??|race=??|map=1@ch_t}} | ||
}} | }} | ||
</div> | |||
<div class="mw-translate-fuzzy"> | |||
== Final Boss == | == Final Boss == | ||
Upon reaching floor 25, you can choose to fight Naght Sieger or continue to climb. | Upon reaching floor 25, you can choose to fight Naght Sieger or continue to climb. | ||
</div> | |||
<div class="mw-translate-fuzzy"> | |||
Reaching floor 50, you'll have to fight Betelgeuse. | Reaching floor 50, you'll have to fight Betelgeuse. | ||
</div> | |||
<div class="mw-translate-fuzzy"> | |||
=== Easy === | === Easy === | ||
{{Monster_Table|data= | {{Monster_Table|data= | ||
| Línea 136: | Línea 159: | ||
{{Monster_Row|id=20997|name=Thorny Skeleton|hp=5,000,000|level=250|def=71|mdef=66|size=Medium|element=Neutral 2|race=Demon|map=2@ch_t}} | {{Monster_Row|id=20997|name=Thorny Skeleton|hp=5,000,000|level=250|def=71|mdef=66|size=Medium|element=Neutral 2|race=Demon|map=2@ch_t}} | ||
}} | }} | ||
</div> | |||
<div class="mw-translate-fuzzy"> | |||
=== Hard === | === Hard === | ||
{{Monster_Table|data= | {{Monster_Table|data= | ||
| Línea 142: | Línea 167: | ||
{{Monster_Row|id=20995|name=Dead Soul|hp=20|level=250|def=100|mdef=100|size=Medium|element=Neutral 2|race=Demon|map=3@ch_t}} | {{Monster_Row|id=20995|name=Dead Soul|hp=20|level=250|def=100|mdef=100|size=Medium|element=Neutral 2|race=Demon|map=3@ch_t}} | ||
}} | }} | ||
</div> | |||
<div class="mw-translate-fuzzy"> | |||
== Difficulty == | == Difficulty == | ||
Betelgeuse has 5 stats: Health, Attack, Recovery, Defense, and Traps. These stats can range from Sealed(0 stars) to 3 stars. | Betelgeuse has 5 stats: Health, Attack, Recovery, Defense, and Traps. These stats can range from Sealed(0 stars) to 3 stars. | ||
* The max difficulty will be 3 stars, with random rolls going from 1 to 3 stars. | * The max difficulty will be 3 stars, with random rolls going from 1 to 3 stars. | ||
</div> | |||
<div class="mw-translate-fuzzy"> | |||
By talking to the fountain before entering the boss room, you can change the difficulty of the fight: | By talking to the fountain before entering the boss room, you can change the difficulty of the fight: | ||
</div> | |||
<div class="mw-translate-fuzzy"> | |||
* Reroll all stats - 1 {{Item List 2|id=1000372|item=Meteorite Dust|simple=yes}} | * Reroll all stats - 1 {{Item List 2|id=1000372|item=Meteorite Dust|simple=yes}} | ||
* Max 1 selected stat - 20 {{Item List 2|id=1000372|item=Meteorite Dust|simple=yes}} | * Max 1 selected stat - 20 {{Item List 2|id=1000372|item=Meteorite Dust|simple=yes}} | ||
| Línea 154: | Línea 185: | ||
* Sealing a stat will lock it at 0 stars and make it unable to be changed. | * Sealing a stat will lock it at 0 stars and make it unable to be changed. | ||
* All stat changes will also be broadcasted to the current map. | * All stat changes will also be broadcasted to the current map. | ||
</div> | |||
<div class="mw-translate-fuzzy"> | |||
{| class="wikitable unsortable" | {| class="wikitable unsortable" | ||
! Stat !! Sealed !! ☆ !! ☆☆ !! ☆☆☆ | ! Stat !! Sealed !! ☆ !! ☆☆ !! ☆☆☆ | ||
| Línea 225: | Línea 258: | ||
* {{Item List 2|id=1000397|item=Soul of Betelgeuse|simple=yes}} | * {{Item List 2|id=1000397|item=Soul of Betelgeuse|simple=yes}} | ||
|} | |} | ||
</div> | |||
<div class="mw-translate-fuzzy"> | |||
== Item Exchange == | == Item Exchange == | ||
You can head back to the Misty Island to use the vending machines to exchange your rewards. | You can head back to the Misty Island to use the vending machines to exchange your rewards. | ||
</div> | |||
<div class="mw-translate-fuzzy"> | |||
* The vending machine will also break down 1x {{Item List 2|id=1000373|item=Meteorite Fragment|simple=yes}} into 40x {{Item List 2|id=1000372|item=Meteorite Dust|simple=yes}}. | * The vending machine will also break down 1x {{Item List 2|id=1000373|item=Meteorite Fragment|simple=yes}} into 40x {{Item List 2|id=1000372|item=Meteorite Dust|simple=yes}}. | ||
* You can break down 1 Stat Meteorite Fragment into 4 Stat Meteorite Powders. | * You can break down 1 Stat Meteorite Fragment into 4 Stat Meteorite Powders. | ||
* Also you can swap Fragments between each other at a rate of 3:1. | * Also you can swap Fragments between each other at a rate of 3:1. | ||
</div> | |||
<div class="mw-translate-fuzzy"> | |||
=== Basic Shop === | === Basic Shop === | ||
{| class="wikitable unsortable mw-collapsible" | {| class="wikitable unsortable mw-collapsible" | ||
| Línea 289: | Línea 328: | ||
* 5x {{Item List 2|id=1000403|item=Wisdom Meteorite Powder|simple=yes}} | * 5x {{Item List 2|id=1000403|item=Wisdom Meteorite Powder|simple=yes}} | ||
|} | |} | ||
</div> | |||
<div class="mw-translate-fuzzy"> | |||
=== Advanced Shop === | === Advanced Shop === | ||
{| class="wikitable unsortable mw-collapsible" | {| class="wikitable unsortable mw-collapsible" | ||
| Línea 378: | Línea 419: | ||
* {{Item List 2|id=490131|item=Stellar Seal|slots=1|simple=yes}} | * {{Item List 2|id=490131|item=Stellar Seal|slots=1|simple=yes}} | ||
|} | |} | ||
</div> | |||
<div class="mw-translate-fuzzy"> | |||
<!-- | <!-- | ||
=== Stellar Seal Accessories === | === Stellar Seal Accessories === | ||
| Línea 468: | Línea 511: | ||
* 100,000z | * 100,000z | ||
|} | |} | ||
</div> | |||
<!--{{Navbox Instance}}--> | <!--{{Navbox Instance}}--> | ||
[[Category:Instances]] | [[Category:Instances]] | ||
Revisión del 12:13 2 feb 2025
Overview
Constellation Tower is the major overhaul of Endless Tower. Guided by Oscar once again, Constellation Tower reaches for the stars in terms of difficulty with its unique random difficulty system and time restriction.
Unlike Endless Tower which had specific monsters and MVPs on designated floors, Constellation Tower's floors have all randomized monsters per floor.
Quest
- In Alberta, talk to Captain Janssen and donate 10,000 Zeny.
- Listen to him and agree to be his first mate so he will bring you to the Misty Island.
- After reaching the island, your party leader must speak with the Oscar . They then must generate the Constellation Tower Dungeon instance.
- After an instance is created, the party will have five minutes to enter and up to 60 minitues to finish the dungeon.
- If in 60 minutes they do not finish, all players in the dungeon will be warped out and sent back to their save points.
- Instance Cooldown starts individually for each party member that enters.
Skips
On every 5th floor you can choose to skip 4 floors by interacting with the top blue brazier at the start of the current floor.
Using a skip costs 50 ![]() Meteorite Dust, increasing by 25 for each skip.
Meteorite Dust, increasing by 25 for each skip.
Monsters
- Monsters are different from their original Endless Tower or field version and don't have their original loot table.
- Monsters become stronger with every floor, increasing both their health and damage.
- Every 5th floor additionally has a random boss monster.
- Boss monsters are not affected by the floor progression difficulty modifier and don't need to be defeated to advance to the next floor.
Normal Monsters
| Monster | Level | HP | Def | Mdef | Size | Element | Race | Spawn |
|---|---|---|---|---|---|---|---|---|
 Jakk |
245 | 40,000,000 | ?? | ?? | ?? | ?? | ?? | |
 Stone Shooter |
245 | 40,000,000 | ?? | ?? | ?? | ?? | ?? | |
 Grizzly |
245 | 40,000,000 | ?? | ?? | ?? | ?? | ?? | |
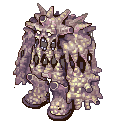 Stalactic Golem |
245 | 40,000,000 | ?? | ?? | ?? | ?? | ?? | |
 Chimera |
245 | 40,000,000 | ?? | ?? | ?? | ?? | ?? | |
 Karakasa |
245 | 40,000,000 | ?? | ?? | ?? | ?? | ?? | |
 Rideword |
245 | 40,000,000 | ?? | ?? | ?? | ?? | ?? | |
 Parasite |
245 | 40,000,000 | ?? | ?? | ?? | ?? | ?? | |
 Wraith |
245 | 40,000,000 | ?? | ?? | ?? | ?? | ?? | |
 Sky Petite |
245 | 40,000,000 | ?? | ?? | ?? | ?? | ?? | |
 Wind Ghost |
245 | 40,000,000 | ?? | ?? | ?? | ?? | ?? | |
 Clock |
245 | 40,000,000 | ?? | ?? | ?? | ?? | ?? | |
 Raydric Archer |
245 | 40,000,000 | ?? | ?? | ?? | ?? | ?? | |
 Increase Soil |
245 | 40,000,000 | ?? | ?? | ?? | ?? | ?? | |
 Penomena |
245 | 40,000,000 | ?? | ?? | ?? | ?? | ?? | |
 Ground Petite |
245 | 40,000,000 | ?? | ?? | ?? | ?? | ?? | |
 Alarm |
245 | 40,000,000 | ?? | ?? | ?? | ?? | ?? | |
 Zombie Prisoner |
245 | 40,000,000 | ?? | ?? | ?? | ?? | ?? | |
 Marionette |
245 | 40,000,000 | ?? | ?? | ?? | ?? | ?? | |
 Permeter |
245 | 40,000,000 | ?? | ?? | ?? | ?? | ?? | |
 Skeleton Prisoner |
245 | 40,000,000 | ?? | ?? | ?? | ?? | ?? | |
 Owl Duke |
245 | 40,000,000 | ?? | ?? | ?? | ?? | ?? | |
 Deviruchi |
245 | 40,000,000 | ?? | ?? | ?? | ?? | ?? | |
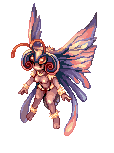 Bloody Butterfly |
245 | 40,000,000 | ?? | ?? | ?? | ?? | ?? | |
 Stapo |
245 | 40,000,000 | ?? | ?? | ?? | ?? | ?? | |
 Taoist Hermit |
245 | 40,000,000 | ?? | ?? | ?? | ?? | ?? | |
 The Paper |
245 | 40,000,000 | ?? | ?? | ?? | ?? | ?? | |
 Tengu |
245 | 40,000,000 | ?? | ?? | ?? | ?? | ?? | |
 Alice |
245 | 40,000,000 | ?? | ?? | ?? | ?? | ?? | |
 Anacondaq |
245 | 40,000,000 | ?? | ?? | ?? | ?? | ?? | |
 Gargoyle |
245 | 40,000,000 | ?? | ?? | ?? | ?? | ?? | |
 Carat |
245 | 40,000,000 | ?? | ?? | ?? | ?? | ?? | |
 Sting |
245 | 40,000,000 | ?? | ?? | ?? | ?? | ?? | |
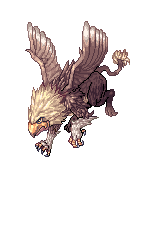 Gryphon |
245 | 40,000,000 | ?? | ?? | ?? | ?? | ?? | |
 Gibbet |
245 | 40,000,000 | ?? | ?? | ?? | ?? | ?? | |
 Nightmare Terror |
245 | 40,000,000 | ?? | ?? | ?? | ?? | ?? | |
 Anolian |
245 | 40,000,000 | ?? | ?? | ?? | ?? | ?? | |
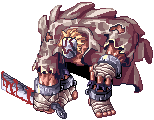 Bloody Murderer |
245 | 40,000,000 | ?? | ?? | ?? | ?? | ?? | |
 Aliot |
245 | 40,000,000 | ?? | ?? | ?? | ?? | ?? | |
 Venatu |
245 | 40,000,000 | ?? | ?? | ?? | ?? | ?? | |
 Deathword |
245 | 40,000,000 | ?? | ?? | ?? | ?? | ?? | |
 Plasma |
245 | 40,000,000 | ?? | ?? | ?? | ?? | ?? | |
 Dimik |
245 | 40,000,000 | ?? | ?? | ?? | ?? | ?? | |
 Mini Demon |
245 | 40,000,000 | ?? | ?? | ?? | ?? | ?? | |
 Leib Olmai |
245 | 40,000,000 | ?? | ?? | ?? | ?? | ?? | |
 Wanderer |
245 | 40,000,000 | ?? | ?? | ?? | ?? | ?? | |
 Retribution |
245 | 40,000,000 | ?? | ?? | ?? | ?? | ?? | |
 Flame Skull |
245 | 40,000,000 | ?? | ?? | ?? | ?? | ?? | |
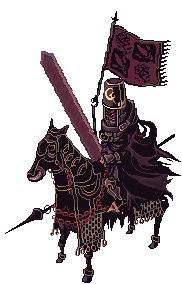 Abysmal Knight |
245 | 40,000,000 | ?? | ?? | ?? | ?? | ?? | |
 Banshee |
245 | 40,000,000 | ?? | ?? | ?? | ?? | ?? |
5th Floor Bosses
| Monster | Level | HP | Def | Mdef | Size | Element | Race | Spawn |
|---|---|---|---|---|---|---|---|---|
 Mastering |
250 | ?? | ?? | ?? | ?? | ?? | ?? | |
 Vagabond Wolf |
250 | ?? | ?? | ?? | ?? | ?? | ?? | |
 Vocal |
250 | ?? | ?? | ?? | ?? | ?? | ?? | |
 Golden Thief Bug |
250 | ?? | ?? | ?? | ?? | ?? | ?? | |
 Mistress |
250 | ?? | ?? | ?? | ?? | ?? | ?? | |
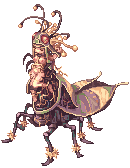 Maya |
250 | ?? | ?? | ?? | ?? | ?? | ?? | |
 Phreeoni |
250 | ?? | ?? | ?? | ?? | ?? | ?? | |
 Drake |
250 | ?? | ?? | ?? | ?? | ?? | ?? | |
 Moonlight Flower |
250 | ?? | ?? | ?? | ?? | ?? | ?? | |
 Bacsojin |
250 | ?? | ?? | ?? | ?? | ?? | ?? | |
 Goblin Leader |
250 | ?? | ?? | ?? | ?? | ?? | ?? | |
 Kobold Leader |
250 | ?? | ?? | ?? | ?? | ?? | ?? | |
 Turtle General |
250 | ?? | ?? | ?? | ?? | ?? | ?? | |
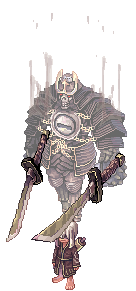 Samurai Specter |
250 | ?? | ?? | ?? | ?? | ?? | ?? | |
 Toad |
250 | ?? | ?? | ?? | ?? | ?? | ?? | |
 Osiris |
250 | ?? | ?? | ?? | ?? | ?? | ?? | |
 Pharaoh |
250 | ?? | ?? | ?? | ?? | ?? | ?? | |
 Amon Ra |
250 | ?? | ?? | ?? | ?? | ?? | ?? | |
 Evil Snake Lord |
250 | ?? | ?? | ?? | ?? | ?? | ?? | |
 Arc Angeling |
250 | ?? | ?? | ?? | ?? | ?? | ?? | |
 Deviling |
250 | ?? | ?? | ?? | ?? | ?? | ?? | |
 Angeling |
250 | ?? | ?? | ?? | ?? | ?? | ?? | |
 Ghostring |
250 | ?? | ?? | ?? | ?? | ?? | ?? | |
 Ygnizem Seniar |
250 | ?? | ?? | ?? | ?? | ?? | ?? | |
 Doppelganger |
250 | ?? | ?? | ?? | ?? | ?? | ?? | |
 Atroce |
250 | ?? | ?? | ?? | ?? | ?? | ?? | |
 Orc Hero |
250 | ?? | ?? | ?? | ?? | ?? | ?? | |
 Orc Lord |
250 | ?? | ?? | ?? | ?? | ?? | ?? | |
 Baphomet |
250 | ?? | ?? | ?? | ?? | ?? | ?? | |
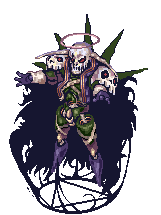 Dark Lord |
250 | ?? | ?? | ?? | ?? | ?? | ?? | |
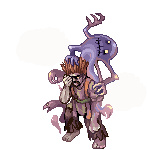 Falling Bishop |
250 | ?? | ?? | ?? | ?? | ?? | ?? | |
 Ifrit |
250 | ?? | ?? | ?? | ?? | ?? | ?? | |
 Randgris |
250 | ?? | ?? | ?? | ?? | ?? | ?? | |
 Beelzebub |
250 | ?? | ?? | ?? | ?? | ?? | ?? | |
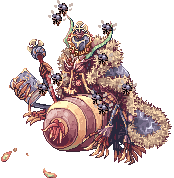 Beelzebub |
250 | ?? | ?? | ?? | ?? | ?? | ?? |
Final Boss
Upon reaching floor 25, you can choose to fight Naght Sieger or continue to climb.
Reaching floor 50, you'll have to fight Betelgeuse.
Easy
| Monster | Level | HP | Def | Mdef | Size | Element | Race | Spawn |
|---|---|---|---|---|---|---|---|---|
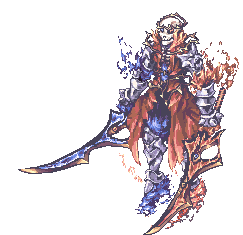 Naght Seiger |
250 | 2,000,000,000 | 410 | 80 | Large | Ghost 3 | Demon | |
 Thorny Skeleton |
250 | 5,000,000 | 71 | 66 | Medium | Neutral 2 | Demon |
Hard
| Monster | Level | HP | Def | Mdef | Size | Element | Race | Spawn |
|---|---|---|---|---|---|---|---|---|
 Betelgeuse |
250 | 2,000,000,000 | 346 | 102 | Large | Neutral 2 | Dragon | |
 Dead Soul |
250 | 20 | 100 | 100 | Medium | Neutral 2 | Demon |
Difficulty
Betelgeuse has 5 stats: Health, Attack, Recovery, Defense, and Traps. These stats can range from Sealed(0 stars) to 3 stars.
- The max difficulty will be 3 stars, with random rolls going from 1 to 3 stars.
By talking to the fountain before entering the boss room, you can change the difficulty of the fight:
- Reroll all stats - 1
 Meteorite Dust
 - Max 1 selected stat - 20
 Meteorite Dust
 - Seal 1 selected stat - 20
 Meteorite Dust
 - Sealing a stat will lock it at 0 stars and make it unable to be changed.
- All stat changes will also be broadcasted to the current map.
| Stat | Sealed | ☆ | ☆☆ | ☆☆☆ |
|---|---|---|---|---|
| Health | 0% | 15% | 30% | 45% |
| Attack | 20% | 40% | 60% | |
| Recovery | 30% | 60% | 90% | |
| Defense | 50% | 100% | 150% | |
| Traps | 85% | 170% | 255% |
Rewards
|
|
| 2@ch_t | Options | ||
|---|---|---|---|
 |
10% | ✘ | |
| 5% | ✘ | ||
| 1% | ✘ | ||
| 1% | ✅ | ||
| 1% | ✅ | ||
| 1% | ✅ | ||
| 3@ch_t | Options | ||
|---|---|---|---|
 |
10% | ✘ | |
| 5% | ✘ | ||
| 1% | ✘ | ||
| 0.50% | ✅ | ||
| 0.50% | ✅ | ||
| 0.50% | ✅ | ||
| 0.50% | ✅ | ||
| 0.50% | ✅ | ||
| 0.50% | ✅ | ||
| Target | Drops (by chance / based on difficulty) |
|---|---|
| Special Treasure Chest |
On difficulty 400 or higher, there is also a 5% chance to obtain one or all of these costumes - |
| Mob | |
| Naght Seiger | |
| Betelgeuse |
Item Exchange
You can head back to the Misty Island to use the vending machines to exchange your rewards.
- The vending machine will also break down 1x
 Meteorite Fragment into 40x
  Meteorite Dust.
 - You can break down 1 Stat Meteorite Fragment into 4 Stat Meteorite Powders.
- Also you can swap Fragments between each other at a rate of 3:1.
Basic Shop
Advanced Shop
Nebula Armor Enchantment
| Item | Slot Order | Minimum Grade | Minimum Refine | Line Options | Reset Process | Enchant Slot 2 | Enchant Slot 3 | Enchant Slot 4 | Chance |
|---|---|---|---|---|---|---|---|---|---|
| 4 > 3 > 2 | No Grade | 9 | Allowed |
|
|
|
|
100.00% | |
|
| ||||||||
|
| ||||||||
|
| ||||||||
|
| ||||||||
|
|

