Illusion
Aun en construcción y traduccion...
Se refiere al contenido relacionado con el episodio 17.1, no confundir con los Illusion Dungeons.
Illusion
Quest Principal
Comenzando la Illusion Quest
| Illusion | |
|---|---|
| Requisitos | |
| Nivel base | 110 |
| Quest Prerrequisito | [Terra Gloria] |
| Recompensas | |
| Experiencia Base | Multiple |
| Experiencia Job | Multiple |
| Item(s) | Multiple |
Esto sucede justo después de la incursión en el laboratorio de Werner, mientras que la Rebelión continúa su investigación.
- En tu habitación personal en el castillo de Prontera, habla con Nihil /navi prt_cas_q 21/39 .
- Dirígete a Einbech y ve al frente de la base Rebelde de Clana Nemieri..
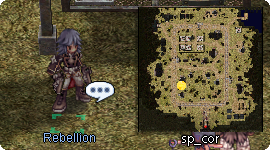
- Habla con el Miembro de la Rebelión /navi einbech 218/80 que está parado afuera de la entrada. Él te informa sobre la expansión de la nueva base de la Rebelión y te da las coordenadas del nuevo edificio en Einbroch.expansion and gives you coordinates to the new building in Einbroch.
- Dirígete al pub secreto de Einbroch en el rincón noreste, Cat on Bullet /navi einbroch 302/328 .
- Entra en el Cat on Bullet y busca a Philopontes /navi pub_cat 93/105 (Tes) en la habitación más al noreste. Él te informará sobre la información que recopilaron durante el asalto al Laboratorio Werner. La nueva tarea de los jugadores será investigar una mina abandonada cercana.
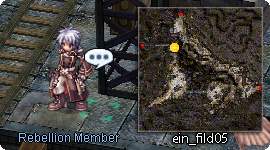
- Camina un mapa hacia el norte y uno hacia el este de Einbroch para encontrar a un Miembro de la Rebelión /navi ein_fild05 156/288 en la entrada a Rudus (no uses la habilidad Wing, simplemente camina a lo largo del riel).
- Entra a Rudus hablando con el Miembro de la Rebelión.
- El Dungeon Rudus ahora será accesible libremente al hablar con este NPC.
Rudus Investigation
| Illusion | |
|---|---|
| Requisitos | |
| Nivel base | 110 |
| Cazar |
|
| Recompensas | |
| Experiencia Base | 800,000 EXP Base |
| Experiencia Job | 800,000 EXP Base |
| Item(s) | 15 |
| Recompensas de Quest | My Name is Morning Acceso a Dungeon Rudus: * Laboratory Waste Disposal Plant Rudus Floor 1 * Laboratory Waste Disposal Plant Rudus Floor 2 * Laboratory Waste Disposal Plant Rudus Floor 3 |
Al ingresar a este mapa, el jugador obtiene inmediatamente acceso a los 3 pisos del Dungeon Rudus, y a la búsqueda diaria de Ilusión "My Name is Morning" ya que se permite el uso de la skill Teleport dentro del mismo.
- Habla con Elena Volkova /navi sp_rudus 184/360 cerca de la entrada de la instalación minera en el interior. Ella menciona que la investigación tomará más tiempo de lo esperado después del descubrimiento de una pared erigida de manera sospechosa.
- Habla con Rookie /navi sp_rudus 193/284 ubicado directamente al sur de Elena. El cual te contara que su progreso está bloqueado por una gran puerta de 3 capas y necesita ayuda para investigarla. Te encomienda investigar alrededor de la pared en busca de otros medios de entrada. Todos se indican con signos de suma amarillos en el mini-mapa.
- Pared en el Ferrocarril - Miembro de la Rebelión /navi sp_rudus 304/266 al este. Deduce que el muro se construyó después de que la refinería ya no estuviera en funcionamiento después de notar cómo atraviesa el ferrocarril en lugar de rodearlo.
- Torre de Vigilancia - Miembro de la Rebelión /navi sp_rudus 121/286 al oeste. Él dice que el pilar junto a la pared era en realidad una torre de vigilancia después de subir a ella y menciona que notó mucha actividad al otro lado de la pared.
- Pequeño Agujero - Observa un Pequeño Agujero /navi sp_rudus 27/300 a lo largo del borde occidente del mapa que pareciera haber sido hecho por un animal pequeño.
- Informa de los hallazgos a Rookie. Mientras tanto, Rookie logró desbloquear la puerta, pero descubrió que estaba diseñada con un mecanismo extraño: alguien tiene que mantener presionado el botón para mantenerla abierta. Señala que el diseño extraño probablemente fue creado para contener lo que había al otro lado, ya que solo ha visto mecanismos similares utilizados en prisiones y penitenciarías.
- Se escucha un ruido ominoso del otro lado de la puerta. Dado que Rookie debe quedarse atrás, se le pide al jugador que investigue en su lugar. Haz clic en Puerta Cerrada para pasar. Caza:
- 10 Dolor
- 10 Venenum
- 10 Twin Caputs
- Opcional: Ve hacia la marca amarilla en el mapa para desbloquear la misión diaria de Ilusión "Learning Morning", descrita en la sección siguiente.
- Informa la presencia de monstruos a Rookie /navi sp_rudus 193/284 , quien confirma que la pared fue diseñada para contener a esos monstruos, como él esperaba.
- Camina hacia el norte para transmitir toda la información descubierta al Capitán Elena Volkova y el jugador es recompensado con dos montones de experiencia. Cada uno de 400,000 EXP Base y Job EXP, y 15 Cor Core.
- Vuelve a Cat on a Bullet Cat Cafe en Einbroch y habla con Tes /navi pub_cat 93/105 . Después de explicarle todo, él piensa que podría ser un sitio de descarga secreto para sujetos de prueba fallidos.
Learning about Morning
- El jugador descubre a un niño pequeño mientras está en el Dungeon Rudus en la marca amarilla del mapa.
- El niño no dice nada, así que el jugador investiga el área para averiguar por qué. Observa un montón de chatarra cercano /navi sp_rudus 124/195 y Dig a través de él.
- El montón de chatarra revela una carta que nos presenta a Morning. Si deseas alimentar a Morning, él come 10 del objeto solicitado.
- Desde ahora la misión diaria "My Name is Morning" de illusion esta disponible.
Securing Regenschirm
| Illusion | |
|---|---|
| Requisitos | |
| Nivel base | 110 |
| Cazar | Sorrow Crob |
| Recompensas | |
| Experiencia Base | 1,000,000 EXP Base |
| Experiencia Job | 800,000 EXP Base |
| Item(s) | 25 |
- Tes le informa al jugador de un invitado inesperado en la sala trasera. Ve a la sala trasera hablando con el Rebellion Retiree /navi pub_cat 104/106 que está parado cerca, a la derecha de Tes.
- Una vez dentro, habla primero con Tes.
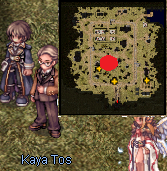
- El jugador se encuentra con Kaya Tos (Caballero de mediana edad), Aas (Guardia Senior de Rekenber) y Est Loveroy. Sigue un largo diálogo que explica que el laboratorio anexo de Rekenber, Regenschirm, fue ocupado por asaltantes que parecían Heart Hunters bajo el mando de alguien llamado Chelin, un ex capitán del equipo de seguridad de Rekenber.
- Luego habla con Kaya Tos, el Caballero de mediana edad. Él solicita que ayuden a Est a recuperar el laboratorio.
- Ve a Lighthalzen. Mira el mini mapa, ve al edificio de la izquierda de la sede de Rekenber y habla con el Guardia de la República /navi lighthalzen 56/270 , donde los Guardias de Rekenber de Aas y Est estarán preparándose.
Regenschirm Instance
- Esta instancia no es recomendada para personajes que no sean de ataque (como Arch Bishops sin Adoramus o Judex), y deberian pedir ayuda antes de crear la instancia.
La instancia puede ser creada, ingresada y destruida tantas veces como sea necesario hasta que se derrote al jefe final. Límite de tiempo de la instancia: 1 hora.
1: Ve a la cafeteria
- Habla con Rekenber Guard Oscar /navi lighthalzen 55/278 para ingresar al edificio (Instancia) y cazar a Sorrow Crob.
- Ve hacia el norte y habla con Aas para abrir la puerta, quien se da cuenta de que también puede apoyar al jugador a través del sistema utilizando el mismo panel de control. Cuando estés listo, habla con ella para pasar al otro lado de la puerta.
- Una vez dentro, ve hacia el noroeste y avanza a través de la puerta entreabierta. Esto te lleva a una escalera recta que sube a la cafetería de los empleados.
- La sala está muy poblada de Traitors (vestidos como Heart Hunters), pero no es necesario eliminar a todos.
- Encontrarás a 3 Investigadores en la cafetería que están siendo mantenidos como rehenes. Elimina a los Traitors para liberarlos.
- Una vez que la cafetería esté despejada, comunícate con Aas usando el Access Controller a la derecha, cerca de la puerta grande.
- Uno de los Investigadores se ofrecerá a ayudar a abrir la puerta para el jugador, ya que se requieren datos biométricos. Pasa a través de ella una vez que se abra.
2: Ve a la Sala de Conferencias
- Encuentra la sala de conferencias al norte de la entrada de la puerta de la cafetería avanzando hacia el norte a través del pasillo cercano. La rebelión se ha encerrado dentro para protegerse del Gas Venenoso.
- Elimina a todos los monstruos de Gas Venenoso fuera de ambas puertas del salón de conferencias para entrar.
- Después de que todo el gas desaparezca, Est llamará al jugador. Habla con Est en el extremo norte del salón de conferencias.
- Ella instruye al jugador que transmita un mensaje a Aas usando un código dado en cualquier dispositivo de comunicación cercano. Afortunadamente, hay un Controlador de Acceso al lado de la pizarra cercana. Habla con él y usa el Código 0315.
3: Ve a Salvar a los Investigadores Detenidos
- Mientras estés dentro del pasillo principal, lucha contra grupos de Fatal Pompoms y Traitors y ve directamente por el camino hacia una serie de habitaciones en el otro extremo del pasillo y luego hacia el sur. Todos los Fatal Pompoms en esta área deben ser eliminados para entrar en los portales.
- Habla con los Detained Researchers en cada una de las 3 habitaciones.
- Cuando intentes entrar a la cuarta habitación, se transmitirá un mensaje pidiendo apoyo en la sala de conferencias.
4: Ve a la Cuarta Habitación
- Aas menciona que vayas a revisar la Sala de Espera de los Guardias (cuarta habitación al final del pasillo anterior) en la esquina inferior derecha de la instancia. Encontrarás a Aas quien ha encontrado la llave maestra de repuesto. /navi 1@rgsr 235/44
- Recoge el documento disperso encima del cajón cercano para activar la misión Data Obtained from the Lab.
5: Ve a la Sala de Reuniones Central
- Dirígete a la Sala de Reuniones Central /navi 1@rgsr 125/157 en el pasillo principal interior. Reúnete con Est y Goni.
- Habla con Aas quien aparece y espera hasta que terminen de hablar. Luego habla de nuevo con Aas para entrar en la sala.
- Camina hacia el norte para encontrar al Restrained Test Subject.
- Investiga los Controllers alrededor de la sala central en el siguiente orden. Presiona el Color del Botón que coincida con el color del aura de luz.
- Panel Superior Derecho = Aura Azul = Botón Azul
- Panel Inferior Izquierdo = Aura Roja = Botón Rojo
- Panel Inferior Derecho = Aura Blanca = Botón Blanco
- Controlador al lado de la puerta Superior Izquierda = Aura Amarilla = Botón Amarillo
- Lucha contra el Sujeto de Prueba, Sorrow Crob. Es una MVP con 3.5 millones de puntos de vida y lanza Firebolt.
- Finalmente, Aas entra justo cuando termina la pelea. Se alegra de encontrar al jugador bien y se ofrece a dejar que el jugador siga adelante mientras ella se encarga de limpiar. Ella ofrecerá 3 opciones:
- Einbroch (esta es la opción sugerida)
- Lighthalzen (teletransporta fuera de la instancia directamente frente a Guard Oscar)
- Seguir mirando un poco más
- Regresa al Cat on a Bullet de Einbroch y busca a Tes /navi pub_cat 93/105 quien ha estado preocupado por un tiempo porque Est regresó sola.
- Informa los detalles de lo que sucedió en Regenschirm y recibe 500,000 Base Exp y 400,000 job Exp dos veces, y 25 Componentes Misteriosos.
Datos Obtenidos del Laboratorio
- Después de encontrar un montón de documentos en la Sala de Espera de los Guardias mientras estás dentro de Regenschirm, Aas solicita al jugador entregar los documentos a Tes para que pueda investigarlos.
- En el Cat on a Bullet, entrega los documentos a Tes y el jugador recibe 200,000 Base Exp y Job Exp.
Investigating Rekenber
- Next, head south and enter the right room behind Wilde NPC (Clothed like Rogue Job Sprite) and talk to Rage who is arguing with Kaya about the Rekenber investigation report and if it's trustworthy or not.
- After Rage moves booths, talk to him again, then talk to Kaya Tos, talk to Rage again (just follow the quest indicator).
- Rage got a list of names of people who've gone missing, but Kaya says that Rekenber has them on rotation and they are still employed. You try to convince them to start a joint investigation and get dragged into being the impartial witness.
- Receive 300,000 Base and Job EXP after finished talking.
- The team agreed to meet at Einbroch airport. Meet Rage who is sitting on a bench west of the airport entrance.
- After the story about how and who to investigate, you will be teleported to Lighthalzen, follow the quest mark in minimap and talk to Rage near the Slums entrance.
- You will be teleported to the slums with activated navigation, follow the path northeast and talk to Rage.
- "Patsy" has apparently been sending money back to his parents without writing any letters, and allegedly used all his vacation time despite promising his family he'd visit on his first vacation.
- Receive 300,000 Base and Job EXP.
- Now you will be teleported out of the slums, navigation will direct you to Rage in front of Rekenber entrance, talk to him.
- Enter the Rekenber office, talk to the first employee you encounter, she should have quest indicator
- In this part, you will move around the office, don't forget to click blue texts to automatically activate Navi and make it easier
- Talk to second employee then go out of the office and go to Regenschirm
- Enter Regenschirm, go right, and talk to Lab Staff behind the easternmost desk in 1st floor
- Go to bottom left room and talk to Employee .
- Go back to Rekenber Office and talk to Secretary with quest indicator, behind the left stairset.
- Go to the document's archive (blue text will trigger Navi) . Now you will be instructed to go to . It is faster to warp into Einbroch and then go north-east-north
- Speak to Kaya Tos in Ein Field 1 and receive 20 Cor Core and 600,000 Base and Job EXP.
Old Memories
- Go back to Cat on Bullet and speak with Philopontes .
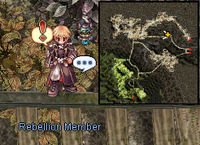
- He will instruct you to go to 1 map north, 1 map west from Einbroch and speak with Rebellion Member there .
- You will proceed to investigate the area, just follow the Navi system to get to the specific coordinates
- You will forced to go back talking with Rebellion Member (Receive 100,000 Base and Job EXP).
- Talk to Rebellion Member again to open the gate to prepare the OS instance, then choose enter to go in.
- If you are not a damage dealer, it's suggested to bring a friend to help clear some monsters. However, it's possible to rush through the monsters.
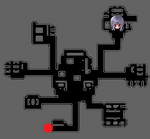
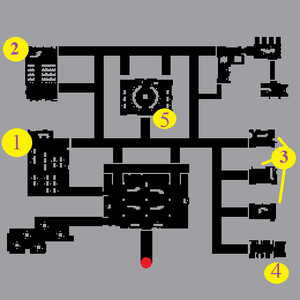
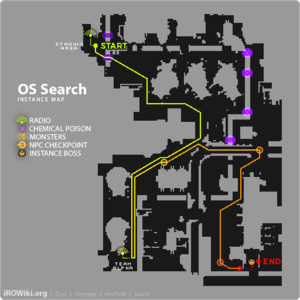
Below is map of the instance:
- Inside, talk with Ridsh, the Three Rebellion Lady will appear with some monsters. Walk over the portals and kill the monsters. Then at the right side, click the Pipe NPC, choose Destroy It to proceed.
- Walk north over the portal, follow the railway until you find Dien, talk to Dien and talk to the black portal. Take a detour until you find an opening to the north.
- Search the area for cables and click all 3 of them.
- Back to following the railway until you find Dien and Cotness. Walk to the east until you find Ridsh. Erst will come and you must proceed over the portal.
- Try to reach the quest mark on the mini-map by going north-east until you're back on the railway.
- You will fight (or ignore and rush through) some monsters from black portals along the way until you will reach the Three Rebellion Lady and Erst.
- Talk to Dien, she will instruct you to get her lucky charm back in Clana Nemieri.
- Receive 25 Mysterious Component and 600,000 Base and Job EXP.
- Go to Clana Nemieri , talk to the Rebellion at , then go into Dien's room on the far right, and click on her drawers to take her lucky charm as Dien's Envelope.
- Go back to OS, talk to Dien , and you will be teleported to Cor.
- Receive 200,000 Base EXP and 100,000 Job EXP.
- OS Occupation side quest is available now.
Helping the Workers
- Walk a bit north and talk to Advance Party .
- Talk to Kaya Tos, then Tes. The team will prompt to go to a safety place, its the middle quest mark in minimap
- Talk to Tes , then Aas will like to talk to Kaya Tos privately, walk a bit northeast and talk to Aas . Keep talking and receive 300,000 Base and Job EXP.
- Finding Patrick side quest is available now.
- Merc vs Merc repeatable quest is available now.
- Help the Farm repeatable quest is available now.
Capturing Eliumina
- Rebellion will intervene after you talk to Aas, so talk to that Rebellion on the new quest mark in minimap, a bit southwest from your position.
- Elena will appear, talk to her and proceed northeast to the new quest mark in minimap.
- Talk to Elena three times, first to trigger the quest, second to create instance, and third to enter it
- This is a solo instance that allows only one person in at a time when not in a solo party.
- When with other players, the first one to enter must be set as the leader and must be able to beat EL1-A17T on their own.
- After the first member returns, the next member to enter should be set as the leader, with the path already cleared just find and talk to Elena.
- Repeat this process until all members are done.
- Avoid closing the instance until all members are done.
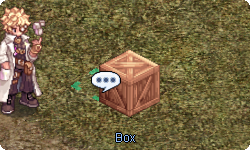
- Talk to Elena inside the instance. 4 quest mark will appear, go to the 2 marks at right side. Talk to each of the boxes and kill all monsters that appear. Then talk to box again so it disappears.
- A new quest mark will appear. Go there and talk to Elena, she will open a portal to next area
- You have to fight a weakened version of a boss, EL1-A17T. Defeat it, then the Rebellion will appear with Eliumina caught.
- Talk to Elena to go out, and then talk to Elena again outside.
- Receive experience: about 200,000 Base EXP; 300,000 and 300,000 and 250,000 Job EXP.
- Also receive 1 Damaged Weapon and 5 Cor Cores.
- A new quest mark will appear in minimap, go there and talk to Goni .
- Talk to Rookie to trigger a long scene, and then the team agreed to enter the Varmundt Mansion through the waterway.
- Go to the new quest mark in far northeast of the minimap and talk to Rookie .
- Receive experience 3 times, 400,000 Job EXP each. Also receive about 300,000 Base EXP.
- Cor Memorial repeatable Instance is available now.
- Finding Patrick sidequest is available now.
- Illusion Equipment and Enchant Modules are available for exchange now.
- Grace Equipment is available now (for level 150+).
This is the end of Illusion Episode Questline. The next quest chain is Episode 17.2: Legacy of the Wise One.
Side Quests
Finding Patrick
- Talk to Kaya Tos .
- He asks whether the adventurer also thinks of this place as an illegal lab. he talks about the relation of missing people in the list to this area, and asks us to go look for Patrick Kaufman.
- Talk to nearby Worker and ask if pats was there. everyone was re-assigned.
- Talk to Researcher near the farm . It turns out he was just there to grow super vegetables for animal food research.
- He recommends you talk to the laundry manager Worker who knows most of the people there and has been around longer.
- The laundry worker turns out to be Marcus Holtzman from lighthalzen. Ask him about Eva Meuler. You give him a chance to write a letter for his worried fiance. Afterwards, ask him about Patrick.
- Pats was also here but was a cleaner. Marcus says the only place left that the player can look for data about him is at the incineration plant.
- Receive 300,000 Base and Job EXP.
- Talk to the incineration plant Worker who is sorting documents at the northwest corner of the map.
- He doesn't know Patrick Kaufman, only Patrick Young. He mentions any other waste from the lab could've been moved out to an external site, including special cargo that could have been people.
- Proceed to the Laboratory Waste Disposal Site, Rudus Dungeon .
- Now at Rudus. Not knowing where to start, try searching Suspicious Trace close by, to the east of the entrance. While searching, suspicious voices are heard.
- Follow the voices to an Abandoned Person at . This location is beyond the wall that divides the upper third of the map from the bottom 2/3 of the map. The wall's effect on blocking paths can be seen on the minimap. Head to Rookie's position marked in red as he is next to the gate through the wall. Continue through the gate to find the source of the voice. This person turns out to be a researcher whose lab blew up. This coated her in chemicals and disfigured her. She confesses that they have been experimenting on people and that they are connected to the numerous disappearances throughout schwartz. Ask her about Patrick Kaufman.
- Fearing that he may already be dead, go look for Patrick's Test Subject Identification Bracelet.
Search through suspicious traces around the map (there are 5-6 areas). The location seems random: - Return to Kaya Tos at and show him the bracelet. The player receives 600,000 Base and Job EXP and 20 Cor Core.
- He asks the player for a favor, and relays them to Aas
To Rudus
- Talk to Aas. She asks us to give rest to 20 Dolors, and bring back 10 Test Subject Identification Bracelets.
The bracelets are obtained received directly into inventory from Dolors. - Return to Aas. receive 225000 base exp ?? job exp 1 Cor Core, 5 machine Component
- To Rudus repeatable quest is available now.
OS Occupation
- In Cor south side, have party leader talk to Erst to create the instance, then enter.
- Let NPCs talk until monsters spawn. Keep killing monsters until the radio npc begins glowing blue. Pick any Engaging option.
- Keep waiting until Erst's annoucement says: [Party Leader's Name]! Check Alpha team's coordinates! Talk to the radio again and choose any option.
- Keep waiting until meteors rain and the poison fog on the east disappears. Head southeast and follow this guide's map's path to the bottom left where Team Alpha is.
- Once the railway is in sight, start going southwest.
- Talk to the Team Alpha radio until it disappears.
- Follow the map's path north. Kill monsters that have spawned. Reach the 1st checkpoint, walk past it, and it'll disppear.
- Then keep going east onto the railway. Kill all monsters that have spawned. Once all are dead, the 2nd checkpoint appears.
- Walk past the checkpoint, it disappears, then follow the map's orange path south.
- Kill monsters that have spawned until the 3rd checkpoint appears.
- Go east, fight a very weakened Miguel, then talk to Erst to exit.
- Receive six chunks of 200,000 Base EXP and 180,000 Job EXP, a total of 1,200,000 Base EXP and 1,080,000 Job EXP.
- 2nd OS Search daily quest available.
Daily Quests
Visit Illusion Daily Quests.
Monsters List
| Name | Level | HP | Def | Mdef | Size | Element | Race | Appears in |
|---|---|---|---|---|---|---|---|---|
| Dolor | 122 | - | - | - | Medium | Poison 2 | Human | Rudus Dungeon (sp_rudus) |
| Venenum | 123 | - | - | - | Medium | Poison 2 | Brute | Rudus Dungeon (sp_rudus), (sp_os), Cor Memorial |
| Twin Caput | 125 | - | - | - | Medium | Shadow 2 | Human | Rudus Dungeon (sp_rudus) |
| Mutant Dolor | 173 | - | - | - | Medium | Poison 3 | Brute | Rudus Dungeon (sp_rudus2), (sp_rudus3) |
| High Hunter Bellare | 165 | - | - | - | Medium | Neutral 3 | Human | Rudus Dungeon (sp_rudus2), Cor Memorial |
| High Hunter Sanare | 168 | - | - | - | Medium | Shadow 3 | Angel | Rudus Dungeon (sp_rudus2) |
| Plaga | 164 | - | - | - | Medium | Neutral 2 | Dragon | Rudus Dungeon (sp_rudus2) |
| R48-85-Bestia (MVP) | 174 | 8,885,000 | - | - | Large | Neutral 4 | Brute | Rudus Dungeon (sp_rudus2) |
| Mutant Twin Caput | 175 | - | - | - | Medium | Shadow 2 | Human | Rudus Dungeon (sp_rudus3) |
| Mutant Venenum | 176 | - | - | - | Medium | Neutral 3 | Human | Rudus Dungeon (sp_rudus3) |
| Mutant Plaga | 178 | - | - | - | Medium | Neutral 3 | Dragon | Rudus Dungeon (sp_rudus3) |
| E-EA1-L | 116 | - | - | - | Medium | - | - | Cor Memorial |
| E-EA2-S | 117 | - | - | - | Medium | - | - | Cor Memorial |
| E-13EN0 | 118 | - | - | - | Medium | - | - | Cor Memorial |
| EL1-EA17T (MVP) | 118 | 16,412,000 | - | - | Large | Neutral 3 | Formless | Cor Memorial |
| Heart Hunter Bellare | 120 | - | - | - | Medium | - | Human | (sp_os), Cor Memorial |
| Heart Hunter Sanare | 120 | - | - | - | Medium | - | Angel | (sp_os) |
| A103-Capute | - | - | - | - | Medium | - | Human | 2nd OS Search |
| Miguel (MVP) | - | Varies | - | - | Medium | Wind 4 | Human | OS Occupation, 2nd OS Search |
| Traitor (Heart Hunter) | - | - | - | - | - | - | - | Regenschirm Instance |
| Fatal Pompom | - | - | - | - | - | - | - | Regenschirm Instance |
| Sorrow Crob (MVP) | 111 | 3,441,000 | - | - | Medium | Neutral 2 | Human | Regenschirm Instance |
Notes:
- Some monsters here can break equipment:
- Miguel MVP casts Bomb (Breaks Weapon)
- High Hunter Bellare casts Acid Terror (Breaks Armor)
- Some monsters inside the OS Occupation and Cor Memorial instances have a low chance to drop Mysterious Components and Cor Cores.
- The 2nd OS Search instance contains variants of Dolors, Heart Hunters Bellare, and Twin Caputs, of varying CP levels ranging from CP1 to CP6. These do not contribute to the daily hunting quests.
